Garden133: A DIY Solar-Powered, Soil Moisture Monitoring System using LoRa
Posted on June 15, 2025 • 12 min read • 2,436 words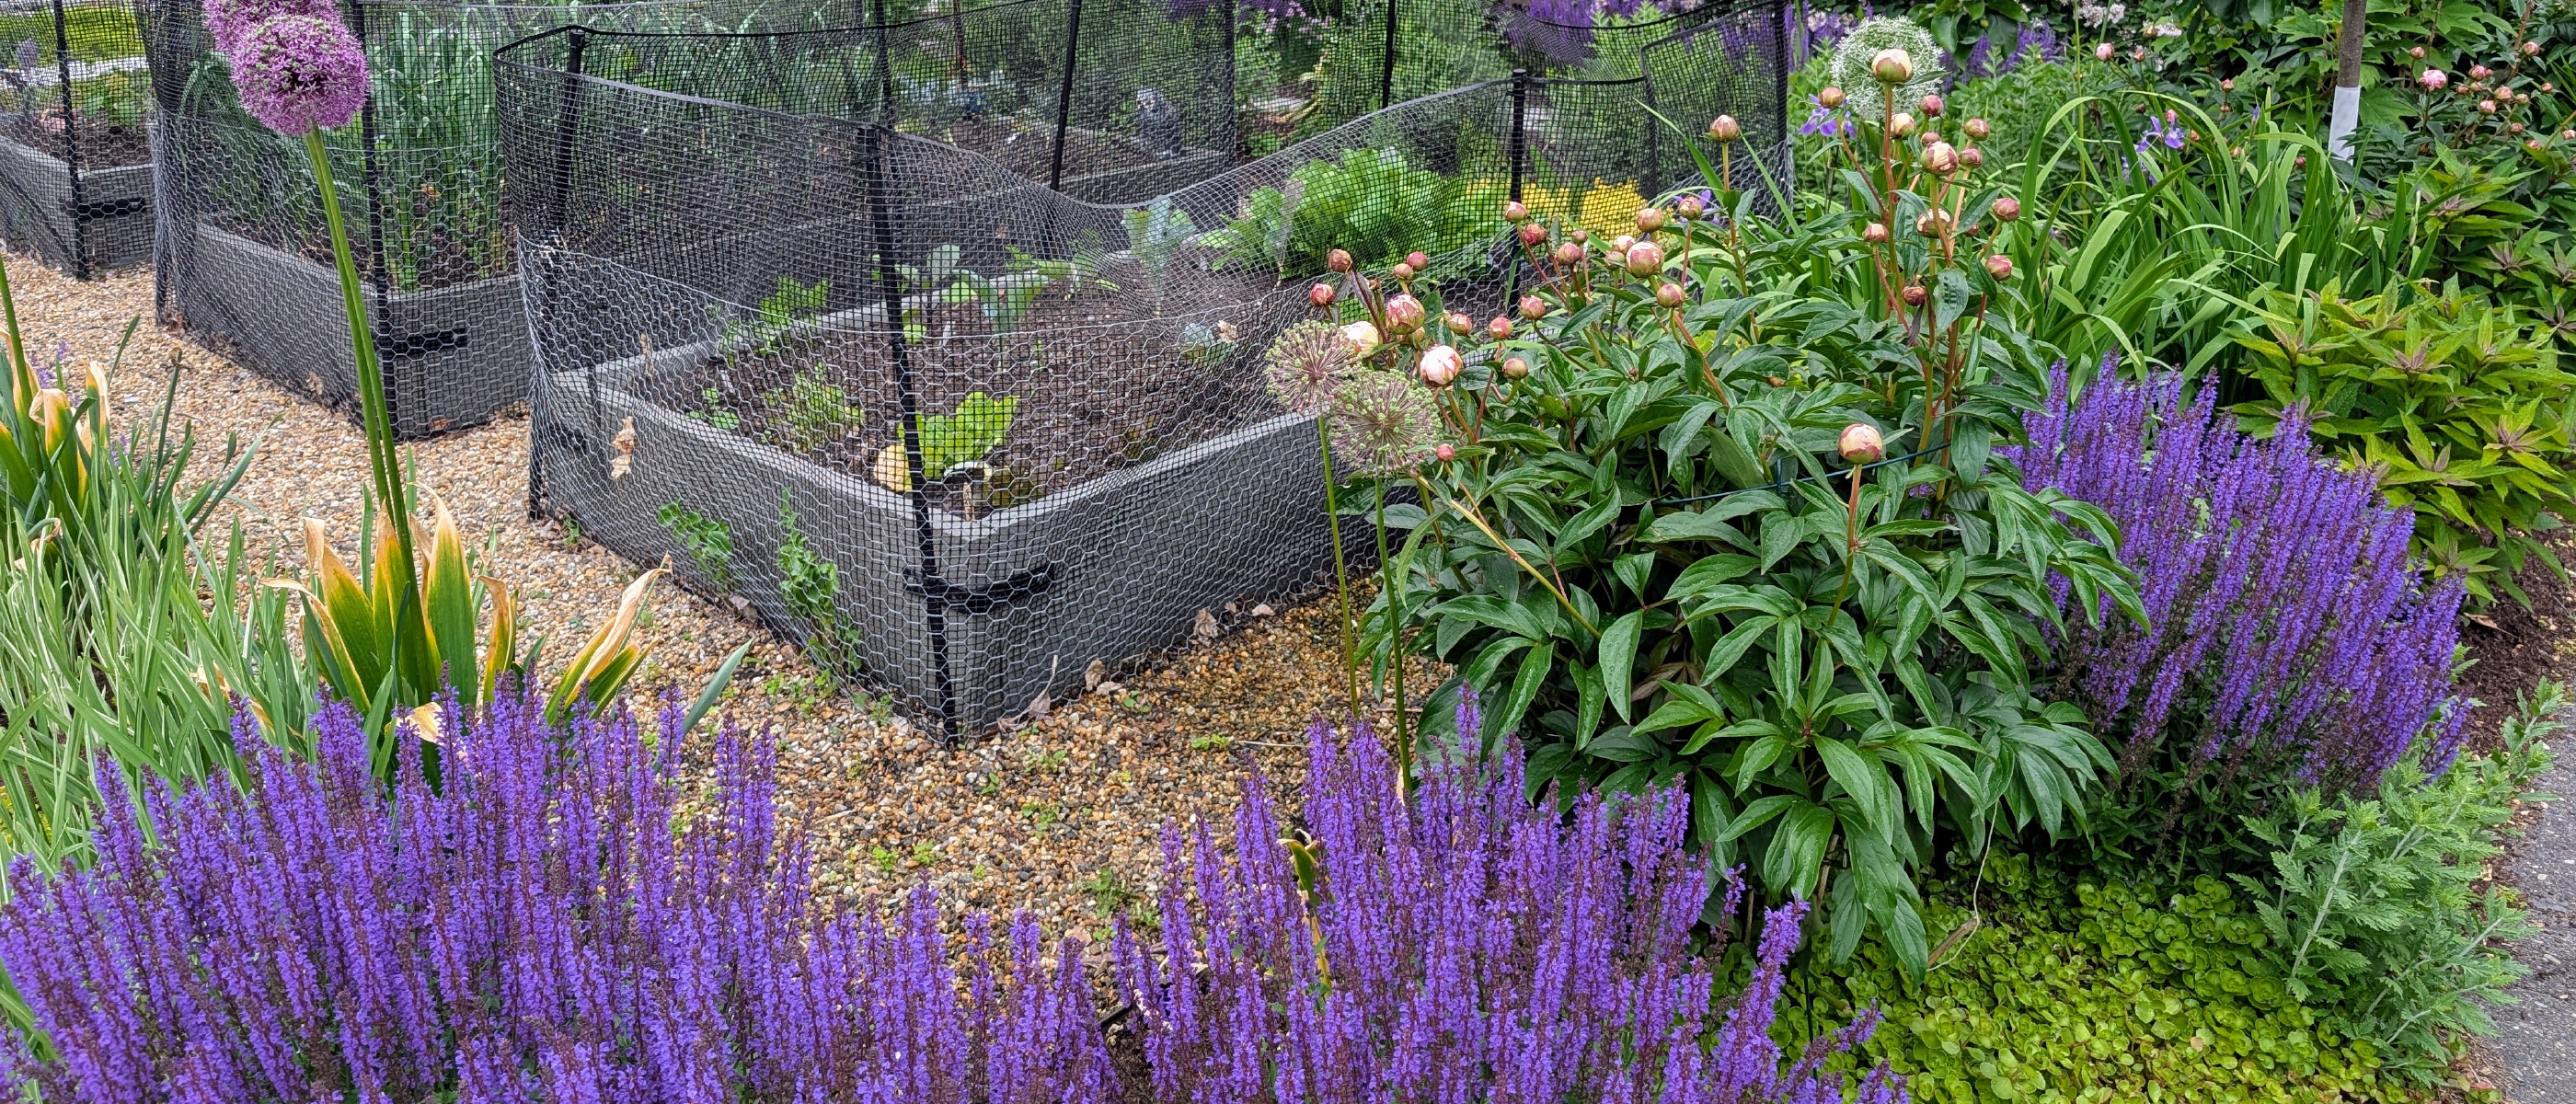
Watering the garden uses a lot of water. Watering the garden when the soil is already wet, such as after a rainstorm, thus wastes a lot of water. We can avoid this waste by detecting when the soil is already moist enough, then canceling any unnecessary watering sessions. Garden133 allows just that: it tracks the moisture level of the soil in the garden so we can water only when needed.
One might argue whether saving water is the real motivation, or whether this is just an excuse to build a new project involving solar panels charging batteries, radio communication, low-power operation, waterproof enclosures, and custom communication protocols. You can be the judge. At any rate, the result is the system described in this blog post.
This was a substantial project, and drafts of this blog post were starting to get long, so I’ve decided to break it up into a sequence of posts. The present post is the the project overview. These follow-up posts have more detailed information about specific aspects of the project:
These posts are sponsored by PCBWay, who generously manufactured the PCBs for the garden sensor boards at no cost to me to help with this blog.
Garden133 System Overview: Solar power, batteries, and radio communication
Garden133 is a system for monitoring the moisture level of soil in your yard or garden.
The sensor devices in the garden, the units that measure soil moisture, are powered by battery
and solar power.
You can leave them outside in the yard as long as the weather is nice enough for plants to grow.
Each of these devices lives in its own moisture-proof enclosure and has a radio module for
communication.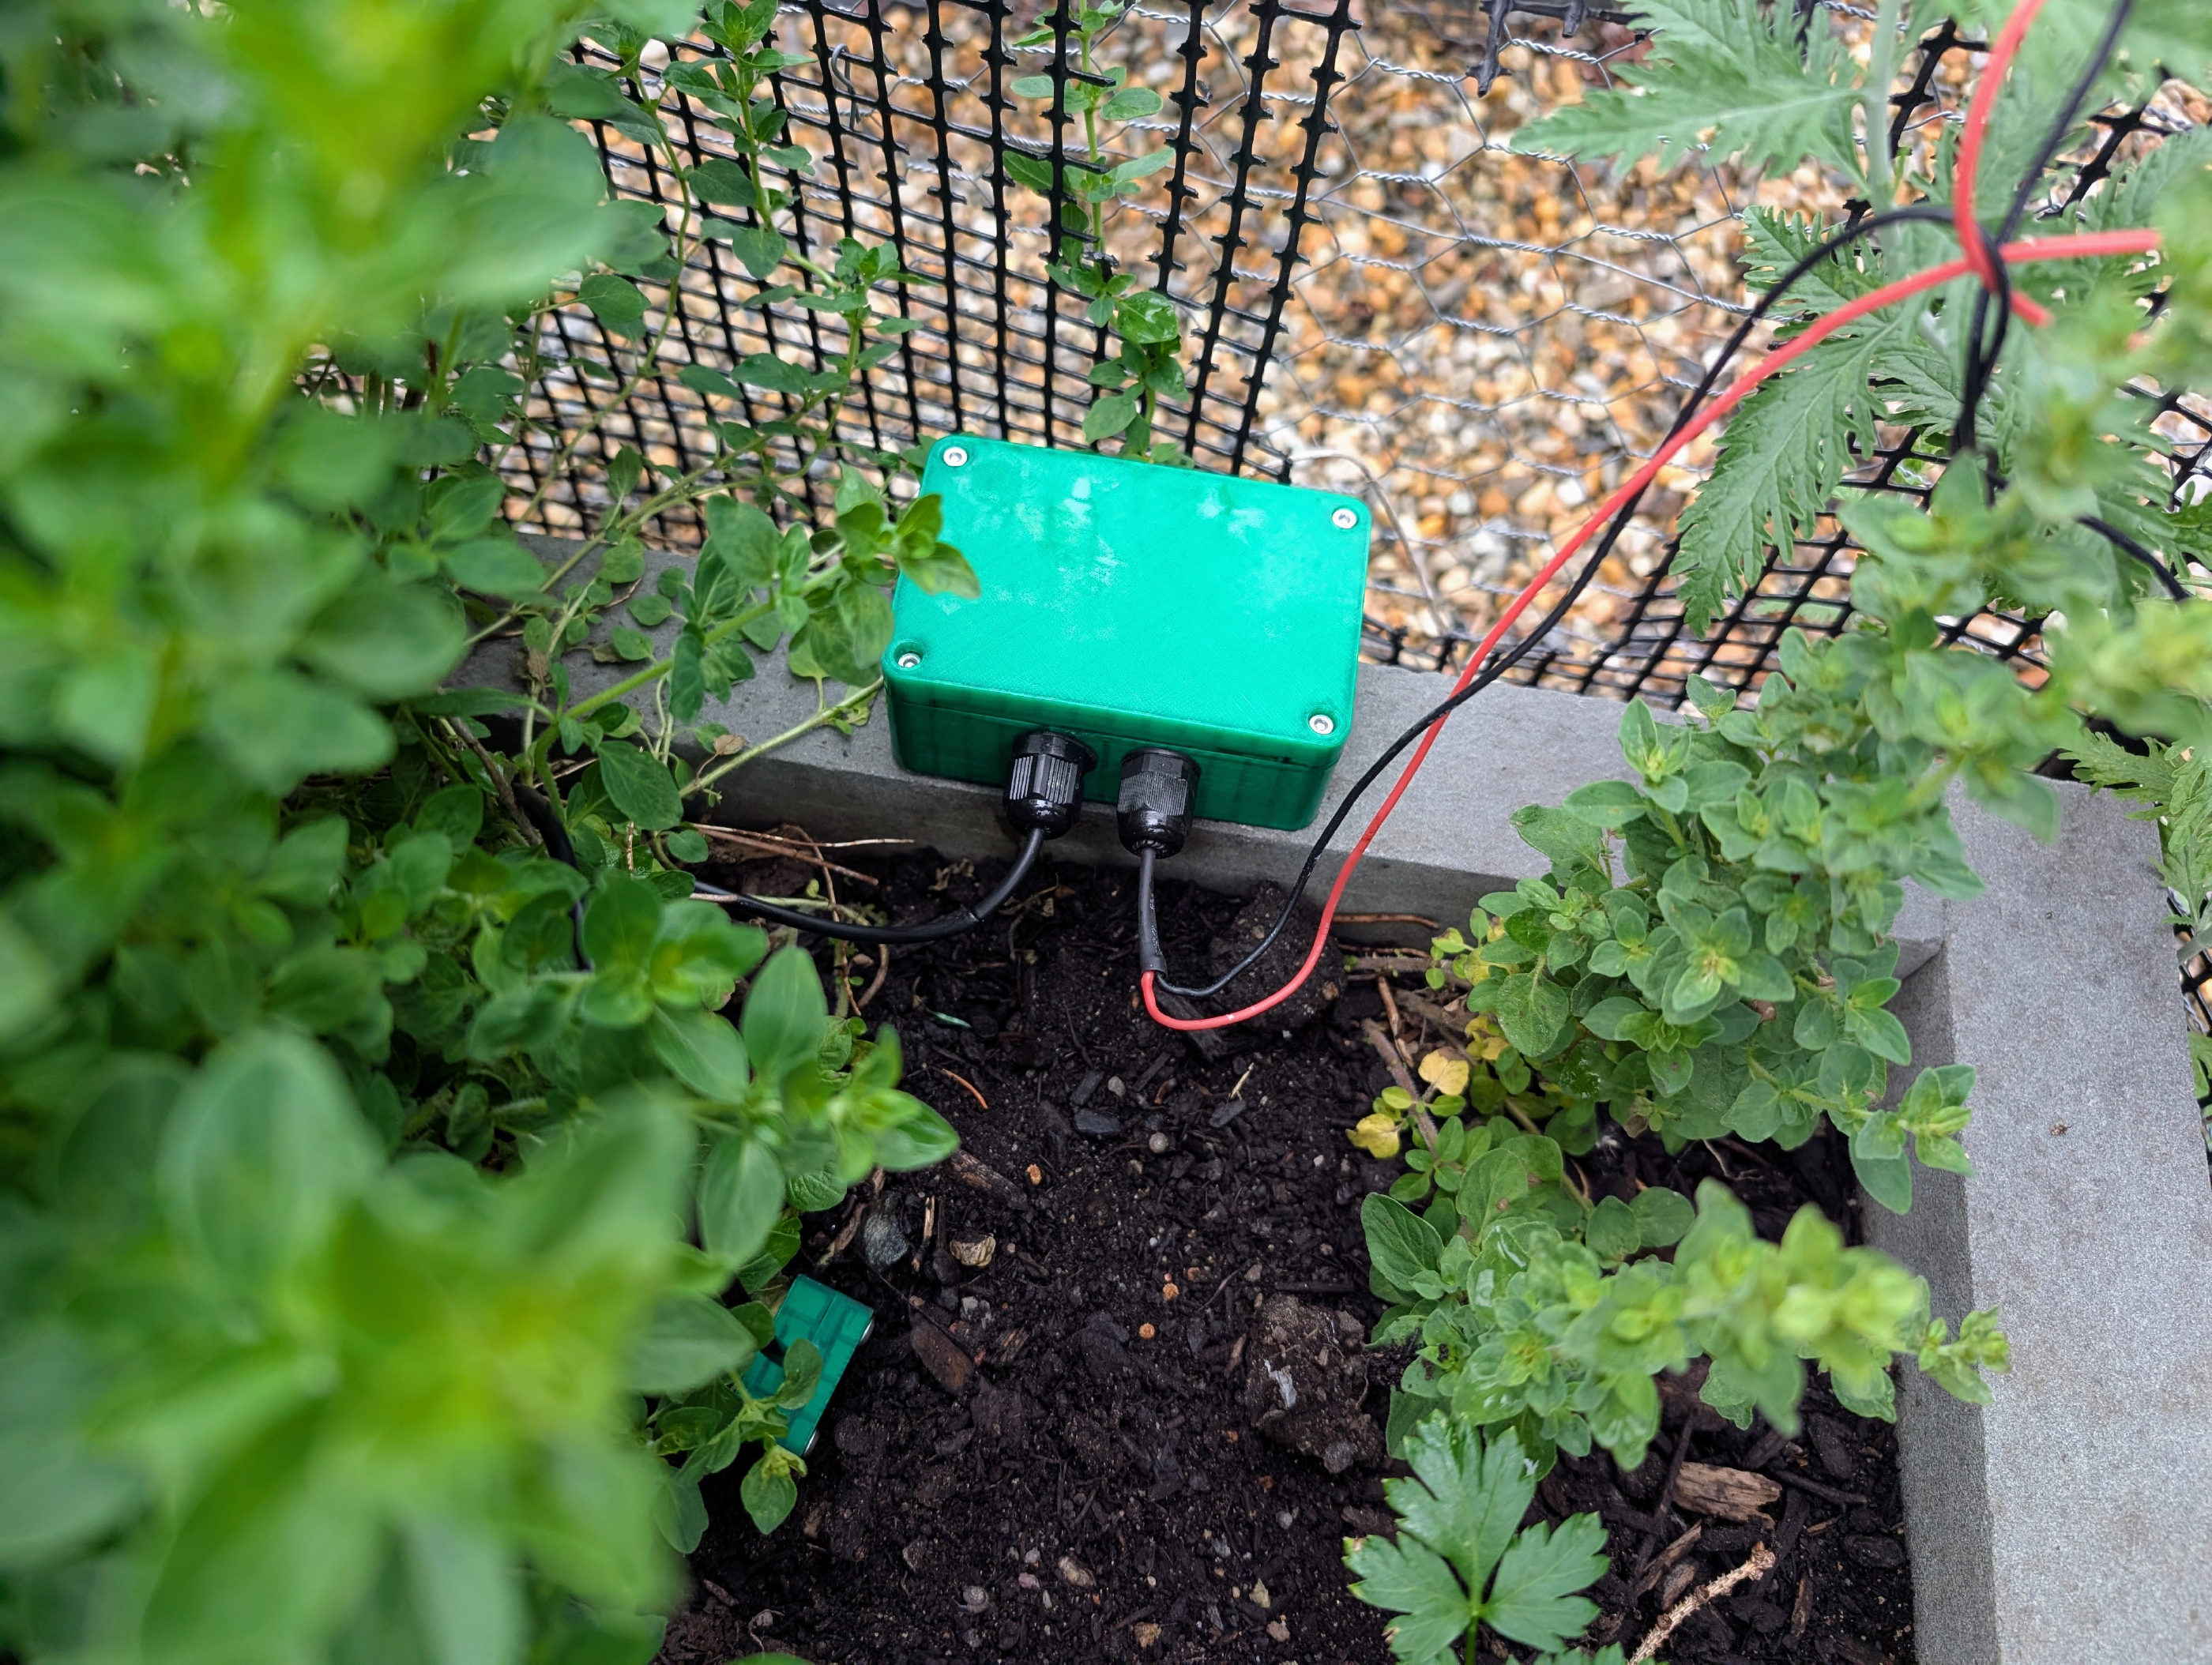
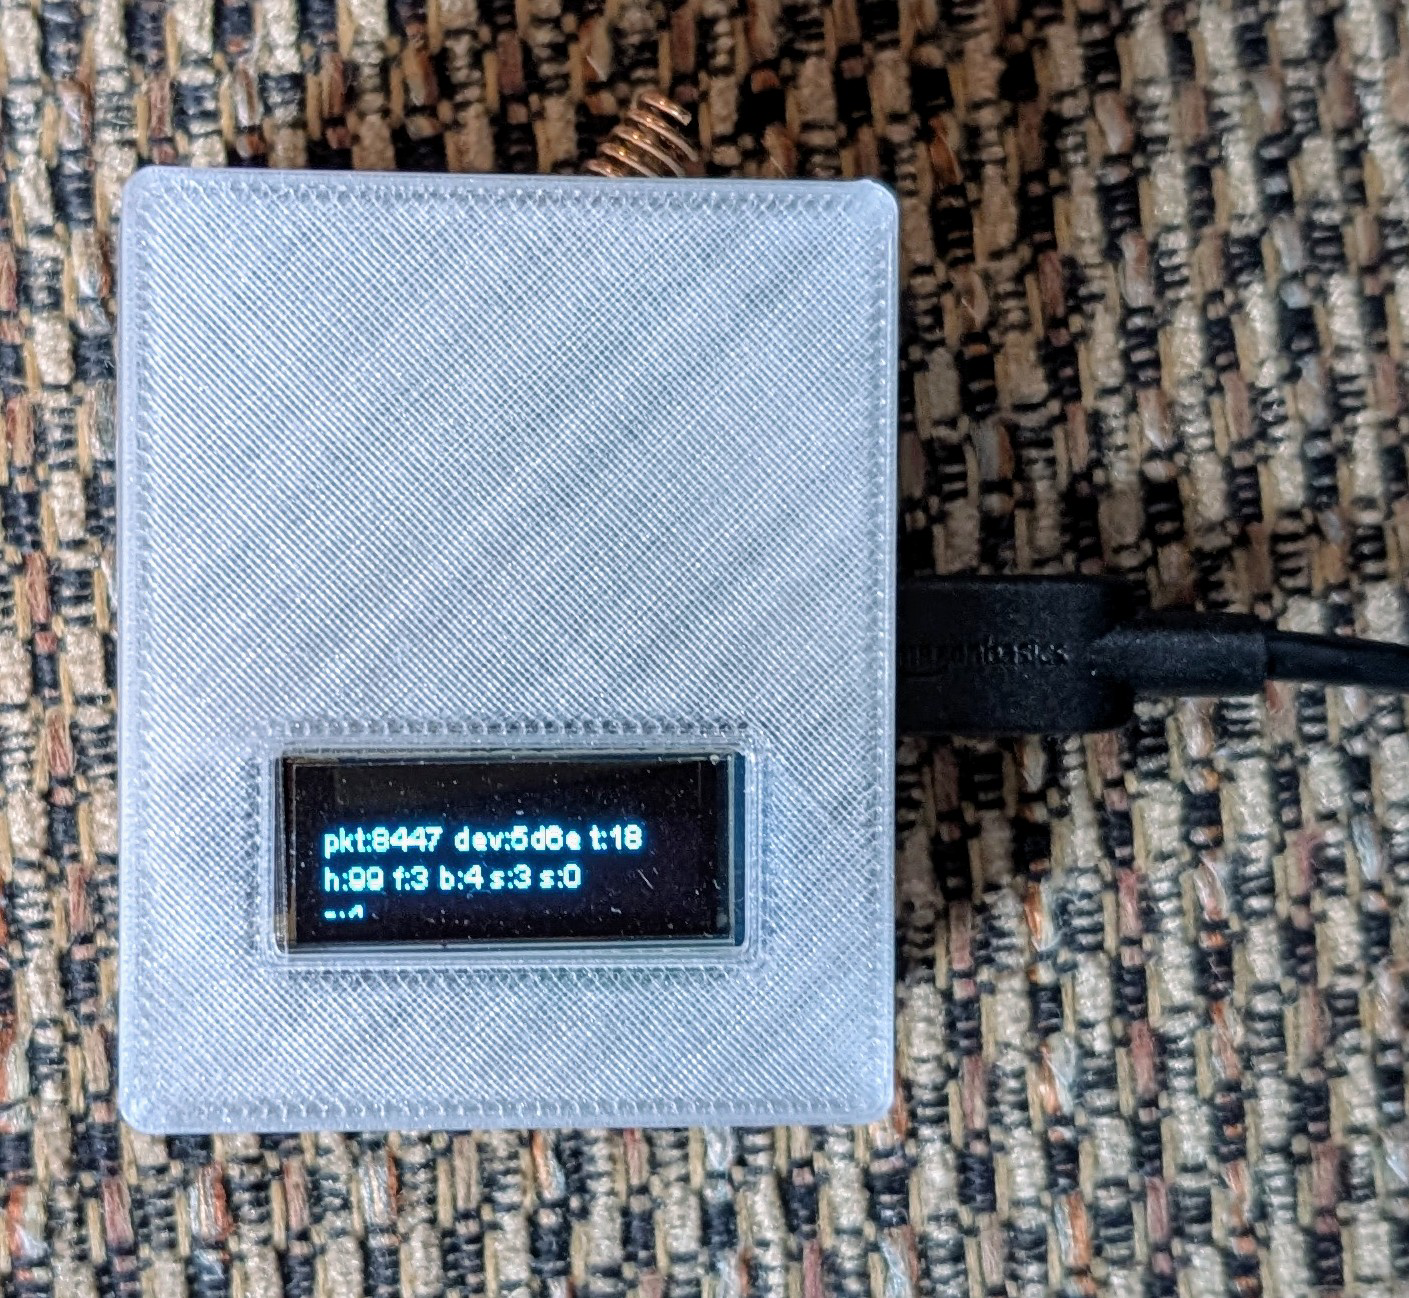
All the sensor devices talk to a single base station, which translates radio packets from the sensor devices into information for a home automation system.
Sources for hardware and software designs for the sensor device ( Garden133) and base station ( LoRa133) are on published on GitHub.
Design requirements
The system was designed to monitor soil moisture in the yard outside my house. This task translates into a number of design requirements:
- There are no power outlets near the places I want to monitor, so each garden sensor unit needs its own power.
- I don’t want to change batteries or charge the sensor devices, so they must use power sparingly and recharge themselves when possible.
- I don’t want to rely on our home WiFi to reach all parts of my yard. Also, WiFi is not designed for low-power devices. So I want to use a radio protocol designed for lower-power and longer ranges. Reporting the moisture level of soil in one spot in the yard requires very few bytes of information, so the radio protocol can be very low bandwidth.
- The garden sensor units need to survive outdoors during growing season, including being rained on.
In addition to these, I had a few preferences:
- The garden sensor units should automatically integrate with Home Assistant1, my home automation platform of choice, working through a single base station. If you add a new sensor, it should simply appear in Home Assistant with no extra steps.
- Garden sensors should have a “debug” mode where they enable WiFi. In this mode, the units should implement a web interface for configuring the device, and support over-the-air firmware updates.
- All hardware components of the system should be relatively inexpensive.
System Design and Architecture
The main aspects of the system design are the overall system architecture, the radio communication design, the hardware design, and the software design. The radio, hardware, and software designs will be described in detail in later posts, so I’ll just summarize them here. The system architecture is described below.
Satellite architecture
The system has a satellite architecture. It is composed of a base station and a number of satellite units (the garden sensor units) which send it sensor readings. The system can handle any number of satellite units, so the actual number is limited only by the needs of the yard/garden and budget and patience for building them.
flowchart LR
  Sat1["`Raised
  bed`"] -.LoRa.-> Base["`Base
  station`"]
  Sat2["Blueberries"] -.LoRa.-> Base
  Sat3["Backyard"] -.LoRa.-> Base
  Base --WiFi--> MQTT["`MQTT
  broker`"]
  MQTT ==Ethernet==> HA["`Home
  Assistant`"]

  linkStyle 0 stroke:green;
  linkStyle 1 stroke:green;
  linkStyle 2 stroke:green;
  linkStyle 3 stroke:orange;
We need to get moisture sensor readings from the yard and garden into Home Assistant. In our basement, a low-power server is running a virtual machine with containers running Home Assistant and an MQTT2 broker. This server can be reached via Ethernet and WiFi. Since neither Ethernet or WiFi is optimal for use in the yard, there must be a communication bridge between satellites and Home Assistant. This bridge is the “base station” unit. It has a dedicated radio module for communicating with the satellite units, and WiFi for communication to the home automation system. The base station lives in the house, which provides it with power, physical protection from the environment, and good connection to the home WiFi network.
I chose to use LoRa3 for radio communication between the satellite units and the base station. LoRa stands for “Long Range.” It is a spread-spectrum radio communication technique, and is specialized for long range, low bandwidth, low power radio communication for Internet of Things (IoT) applications. There are many other radio technoliges that might have worked, including Zigbee and ESPNow. I tried LoRa because modules were relatively inexpensive, and it is a good choice if you want to trade bandwith for maximum range and reliability. Andreas Spiess has some fun videos about LoRa, and there is a straightforward tutorial online which makes it easy to get working.
The garden sensor units operate in a manner designed to minimize battery usage. They wake up, take a reading, send data to the base station, turn off their radio, set a timer to wake-up again after a few minutes, then go back into low-power deep-sleep mode.
flowchart LR
  wake(["Wake-up"]) --> read(["`Read
  sensors`"])
  read --> send(["`Send radio
  packet`"])
  send --> sleep(["`Deep
  sleep`"])
  sleep --> wake
To minimize the time the units must stay on and to keep the system simple, the garden sensor units do not wait for a reply packet. They sleep immediately after sending a sensor reading packet.
I want neither the base station nor Home Assistant to need a priori information about garden sensor units being deployed. If you add a sensor unit to the system, it should just show up automatically in Home Assistant. Thus the satellite garden sensor unit, when first powered on, sends a sequence of radio packets describing itself to the base station. These packets include the basic information about the device including its name, manufacturer, software and hardware versions, and an individual device ID. They also describe all the sensor readings the device provides, including the id number, name, sensor type, and measurement units.
Because there is only one-way communication, the satellite unit does not know whether the base station has received information about the device and its sensors. So it retransmits this information every hour alongside the sensor reading packets. It sends information about each sensor in turn alongside each individual sensor reading packet until all sensors have been described. That way if a packet is dropped or the base station is reset, the base station should have recovered a full description of the device after an hour.
The base station listens for packets from the satellites, and translates them into MQTT messages. LoRa packets describing a device and its sensors are translated into messages using the Home Assistant MQTT discovery protocol. This causes Home Assistant to automatically create device and entity records for the satellite unit. LoRa packets containing sensor readings are translated into MQTT messages which tell Home Assistant to set these values for its corresponding device and entity records.

Radio communication
As stated before, I chose to use LoRa for communication between the satellite units and the base station. This communication is currently one-way: satellite to base station. I created a custom protocol for this communication, with a simple packet structure and a message which uses Protocol Buffer4 encoding. This design are discussed in more detail in a separate post.
Hardware design
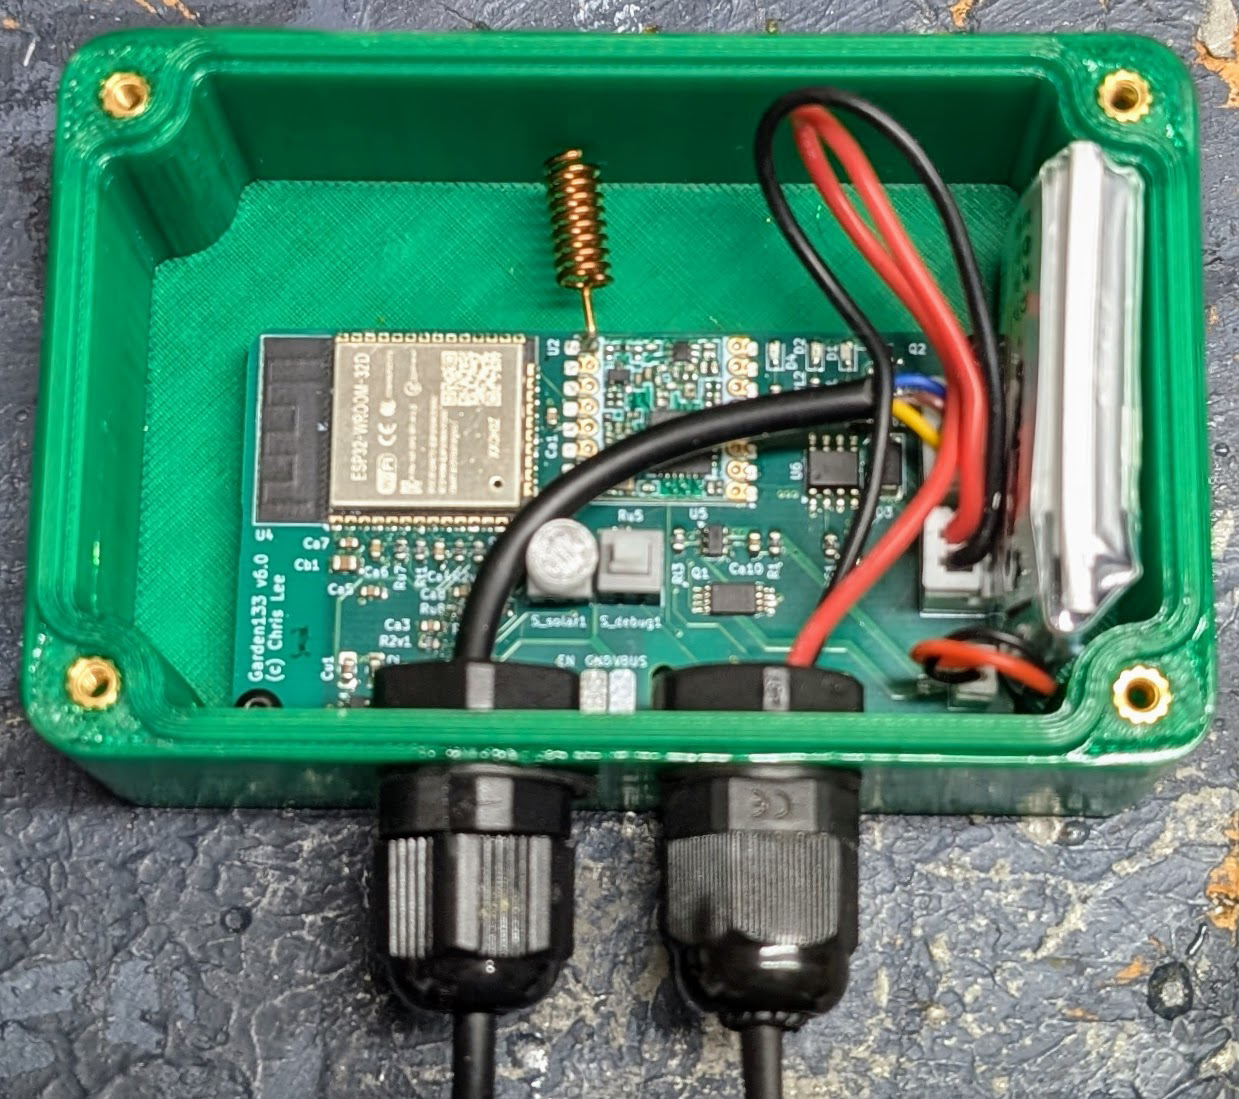
Both the base station and satellite units are built around ESP325-based printed circuit boards I designed for this project. They use HopeRF RFM95W LoRa radio modules. The satellite unit also contains a battery, a moisture sensor, and a solar panel. The PCB and battery for the satellite unit are contained in a 3D-printed enclosure from a customizable “waterproof” enclosure design found online. The enclosure is printed in PETG and coated with epoxy. It uses cable glands to allow cables for the moisture sensor and solar panel to pass through the enclosure. The PCBs are manufactured by my sponsor PCBWay.
Firmware design
The base station and satellite units are programmed in C++ using my og36 library.
I also created the
og3x-satellite library
to work with it and implement the satellite to base station communication protocol, and
the
og3x-lora library for integration with the LoRa modules.
These libraries make it easy to register sensor readings in the satellite units which
show up automatically in Home Assistant.
They also make it easy to configure the radios and other system components via a web interface.
The firmware design is discussed in this follow-on post.
Automated watering
The end goal of this project is to save water.
To achieve this end, something must decide whether or not to water the garden based on information
from the sensors.
To make this possible, I switched our garden watering system to use Zigbee7-based watering
valves which can be controlled via Home Assistant.
After reading
this blog post
by
Smart Home Scene
I got a couple of GIEX Zigbee Sprinkler Timer units
(
Amazon)
and integrated them into my smart home system, using
Zigbee2MQTT,
which was already heavily used in my home.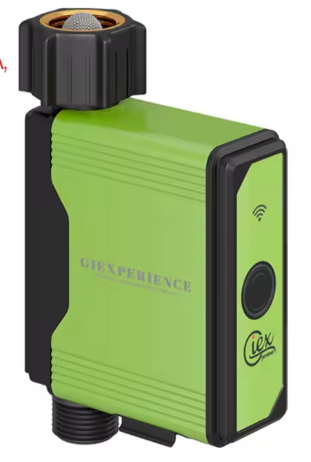
Watering is controlled by Home Assistant automations.
The raised bed watering valve turns on at 6am for 30 minutes, unless the moisture level of the
soil in the raised beds reads 90% or more.
Every other day, the watering valve for the blueberries then turns on at 6:30am for
45 minutes, unless the moisture level of the soil near the blueberries reads 90% or more.
The “90% value” is a rough measure.
I captured the ADC reading of the dry moisture sensor in the air and call it “0%”,
then the reading when the sensor is immersed in water and called it “100%”.
I linear-interpolate percentage values from there.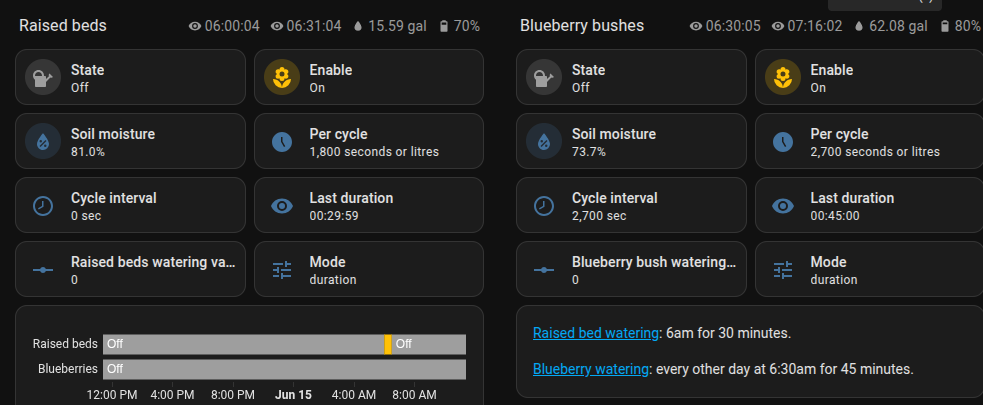
To be honest, I was a bit nervous about using these Zigbee valves. I don’t want a device failure such as a communication failure or running out of batteries to cause our watering system to stay on for hours (or days!). I like the fact that you can specify the maximum time for watering in the device settings so that a Zigbee communication failure (or the house losing power, etc…) does not mean that the valve will stay on indefinitely. I experimented with these settings a few times until I was convinced I had them set up to limit watering properly. I also monitor the watering in Home Assistant. If the valves are not confirmed via Zigbee communication to be off one minute after they are supposed to have turned off, then a separate command to turn the valve off is sent and I get a notification to my phone to investigate.
I pulled the batteries out of the valve while it was running and I found that water continued to flow. So the valve is apparently not using a mechanism which defaults to off when not powered. For this reason I put fresh batteries in each valve at the start of the watering season, and setup Home Assistant to send my phone a notification if the battery gets low. If the valve runs out of batteries during operation, this will result in a communication failure at the end of scheduled watering, which will thus also trigger the phone notification. The valves are on an outdoor faucet on the side of my house. To get reliable Zigbee communication to them, I found I needed to mount a Zigbee smart-plug that acts as a signal repeater at an outlet close to the other size of the exterior wall from the valves. So far, after a couple months, all seems well.
Real-world Data: Soil Moisture Response to Rain
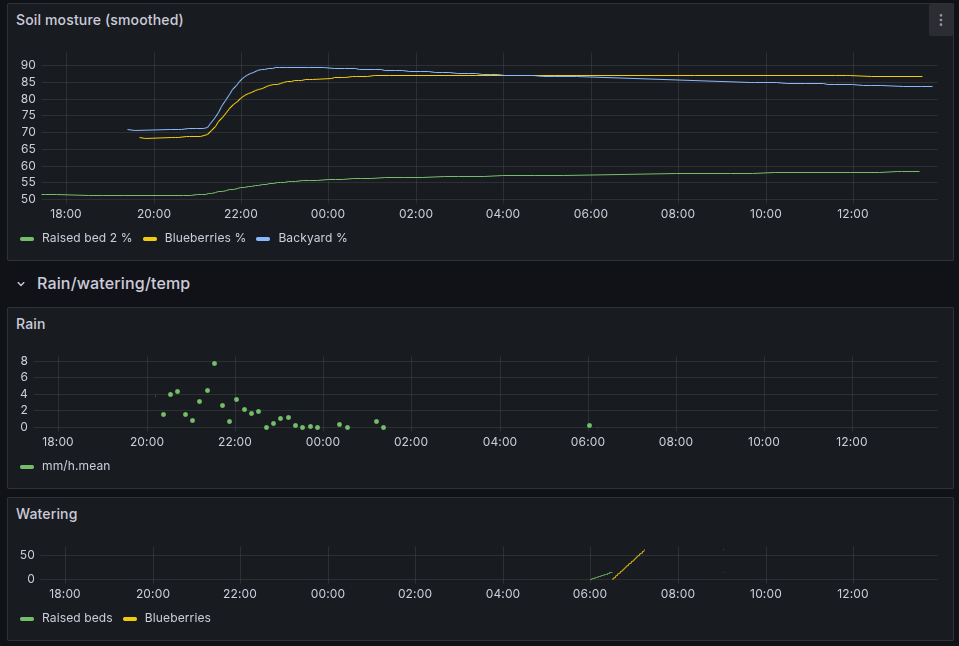
Here is a Grafana view of an evening rainstorm in our yard. The effects are felt quickly in the back yard, and near the blueberry bushes. The change in moisture level seen by the sensor in the raised bed is more muted.
Conclusion
This is a brief introduction to a system I’ve been working on for a number of years. The different aspects such as radio communication, solar power, enclosures have kept it fun and interesting. It has even saved a few gallons of water so far. Much more detail about the different components of the system will follow!
References
Home Assistant is a popular Open Source home automation platform. It is the hub for my own smart home, and it is fun to work with. ↩︎
The MQTT protocol ( Wikipedia) is useful for IOT (Internet of Things) applications. ↩︎
LoRa (the name stands for “long range”) is a physical proprietary radio communication technique ( Wikipedia, Semtech). It is specialized for long range, low bandwidth, low power radio communication for Internet of Things (IoT) applications. ↩︎
Protocol Buffer or “Protobuf”, is Google’s language-neutral, platform-neutral, extensible mechanism for serializing structured data. Compared to json or XML, it is much more compact, but it is not human-readable in the same way. ↩︎
ESP32: a family of microcontrollers made by Espressif Systems. A successor to the ESP8266 microcontroller. ↩︎
og3is my C++ utility library for ESP microprocessors, published on GitHub. ↩︎Zigbee is a low-power wireless mesh network standard targeted at battery-powered devices in wireless control and monitoring applications ( Wikipedia). ↩︎