Improved PCB Stencil Alignment with 3D Printed Fixtures
Posted on October 25, 2025 • 3 min read • 626 words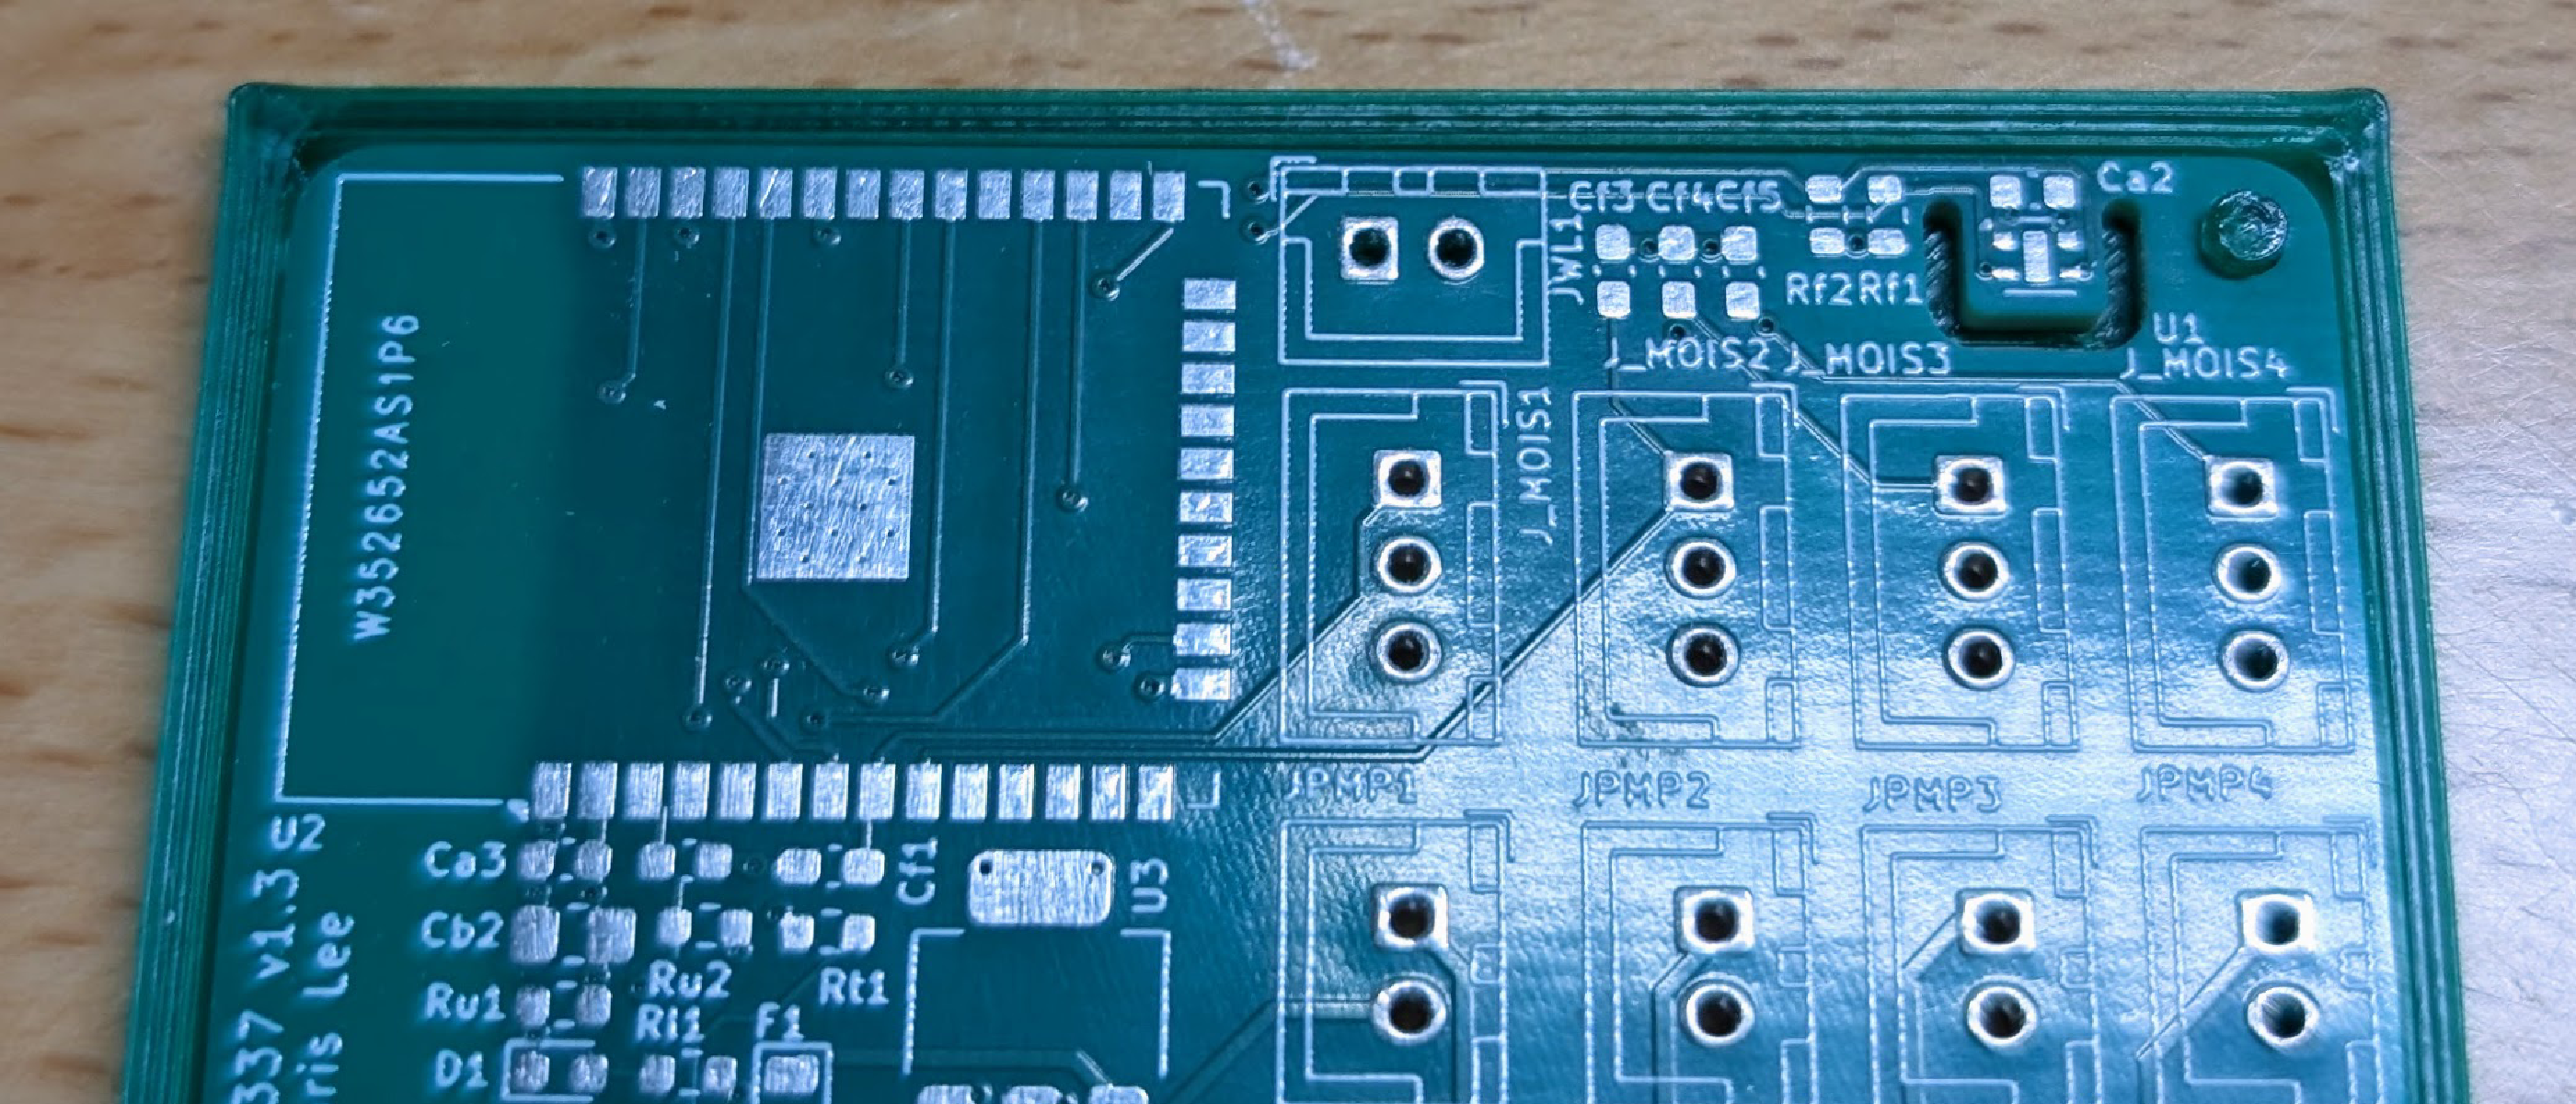
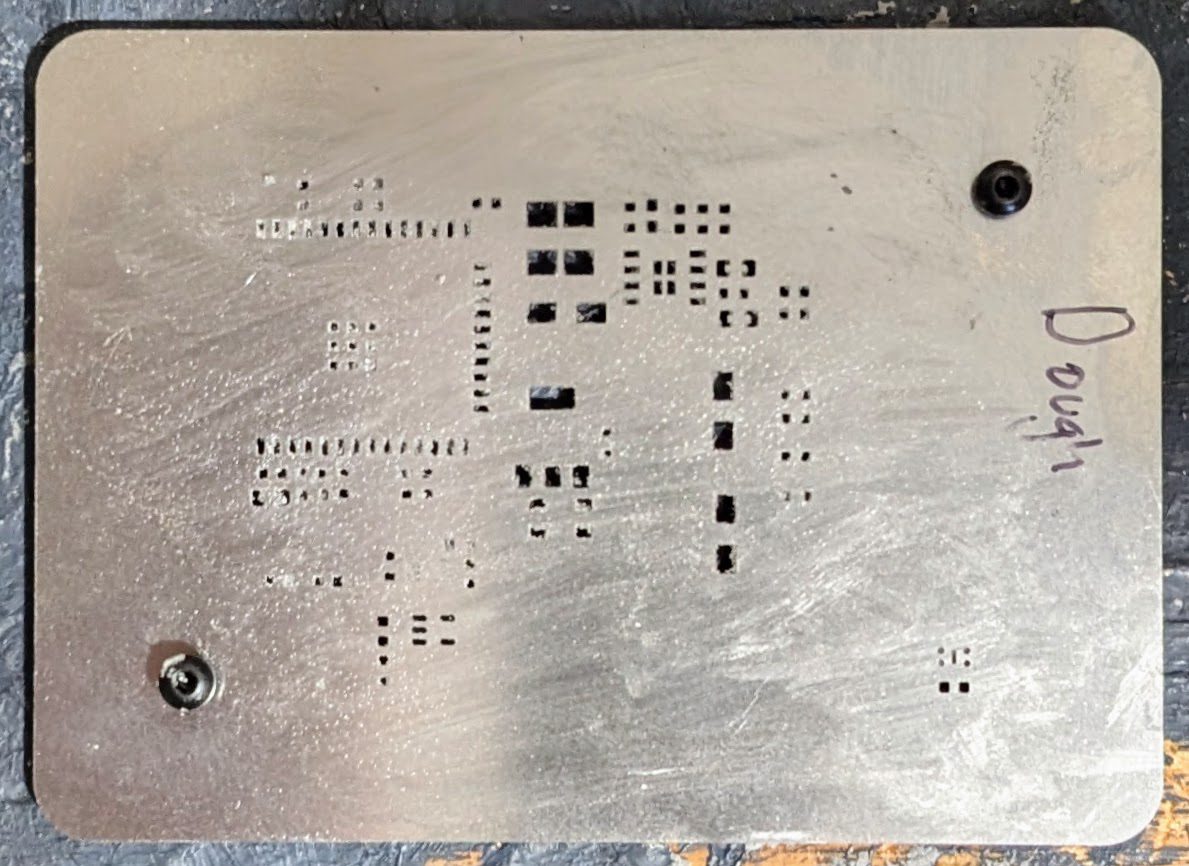
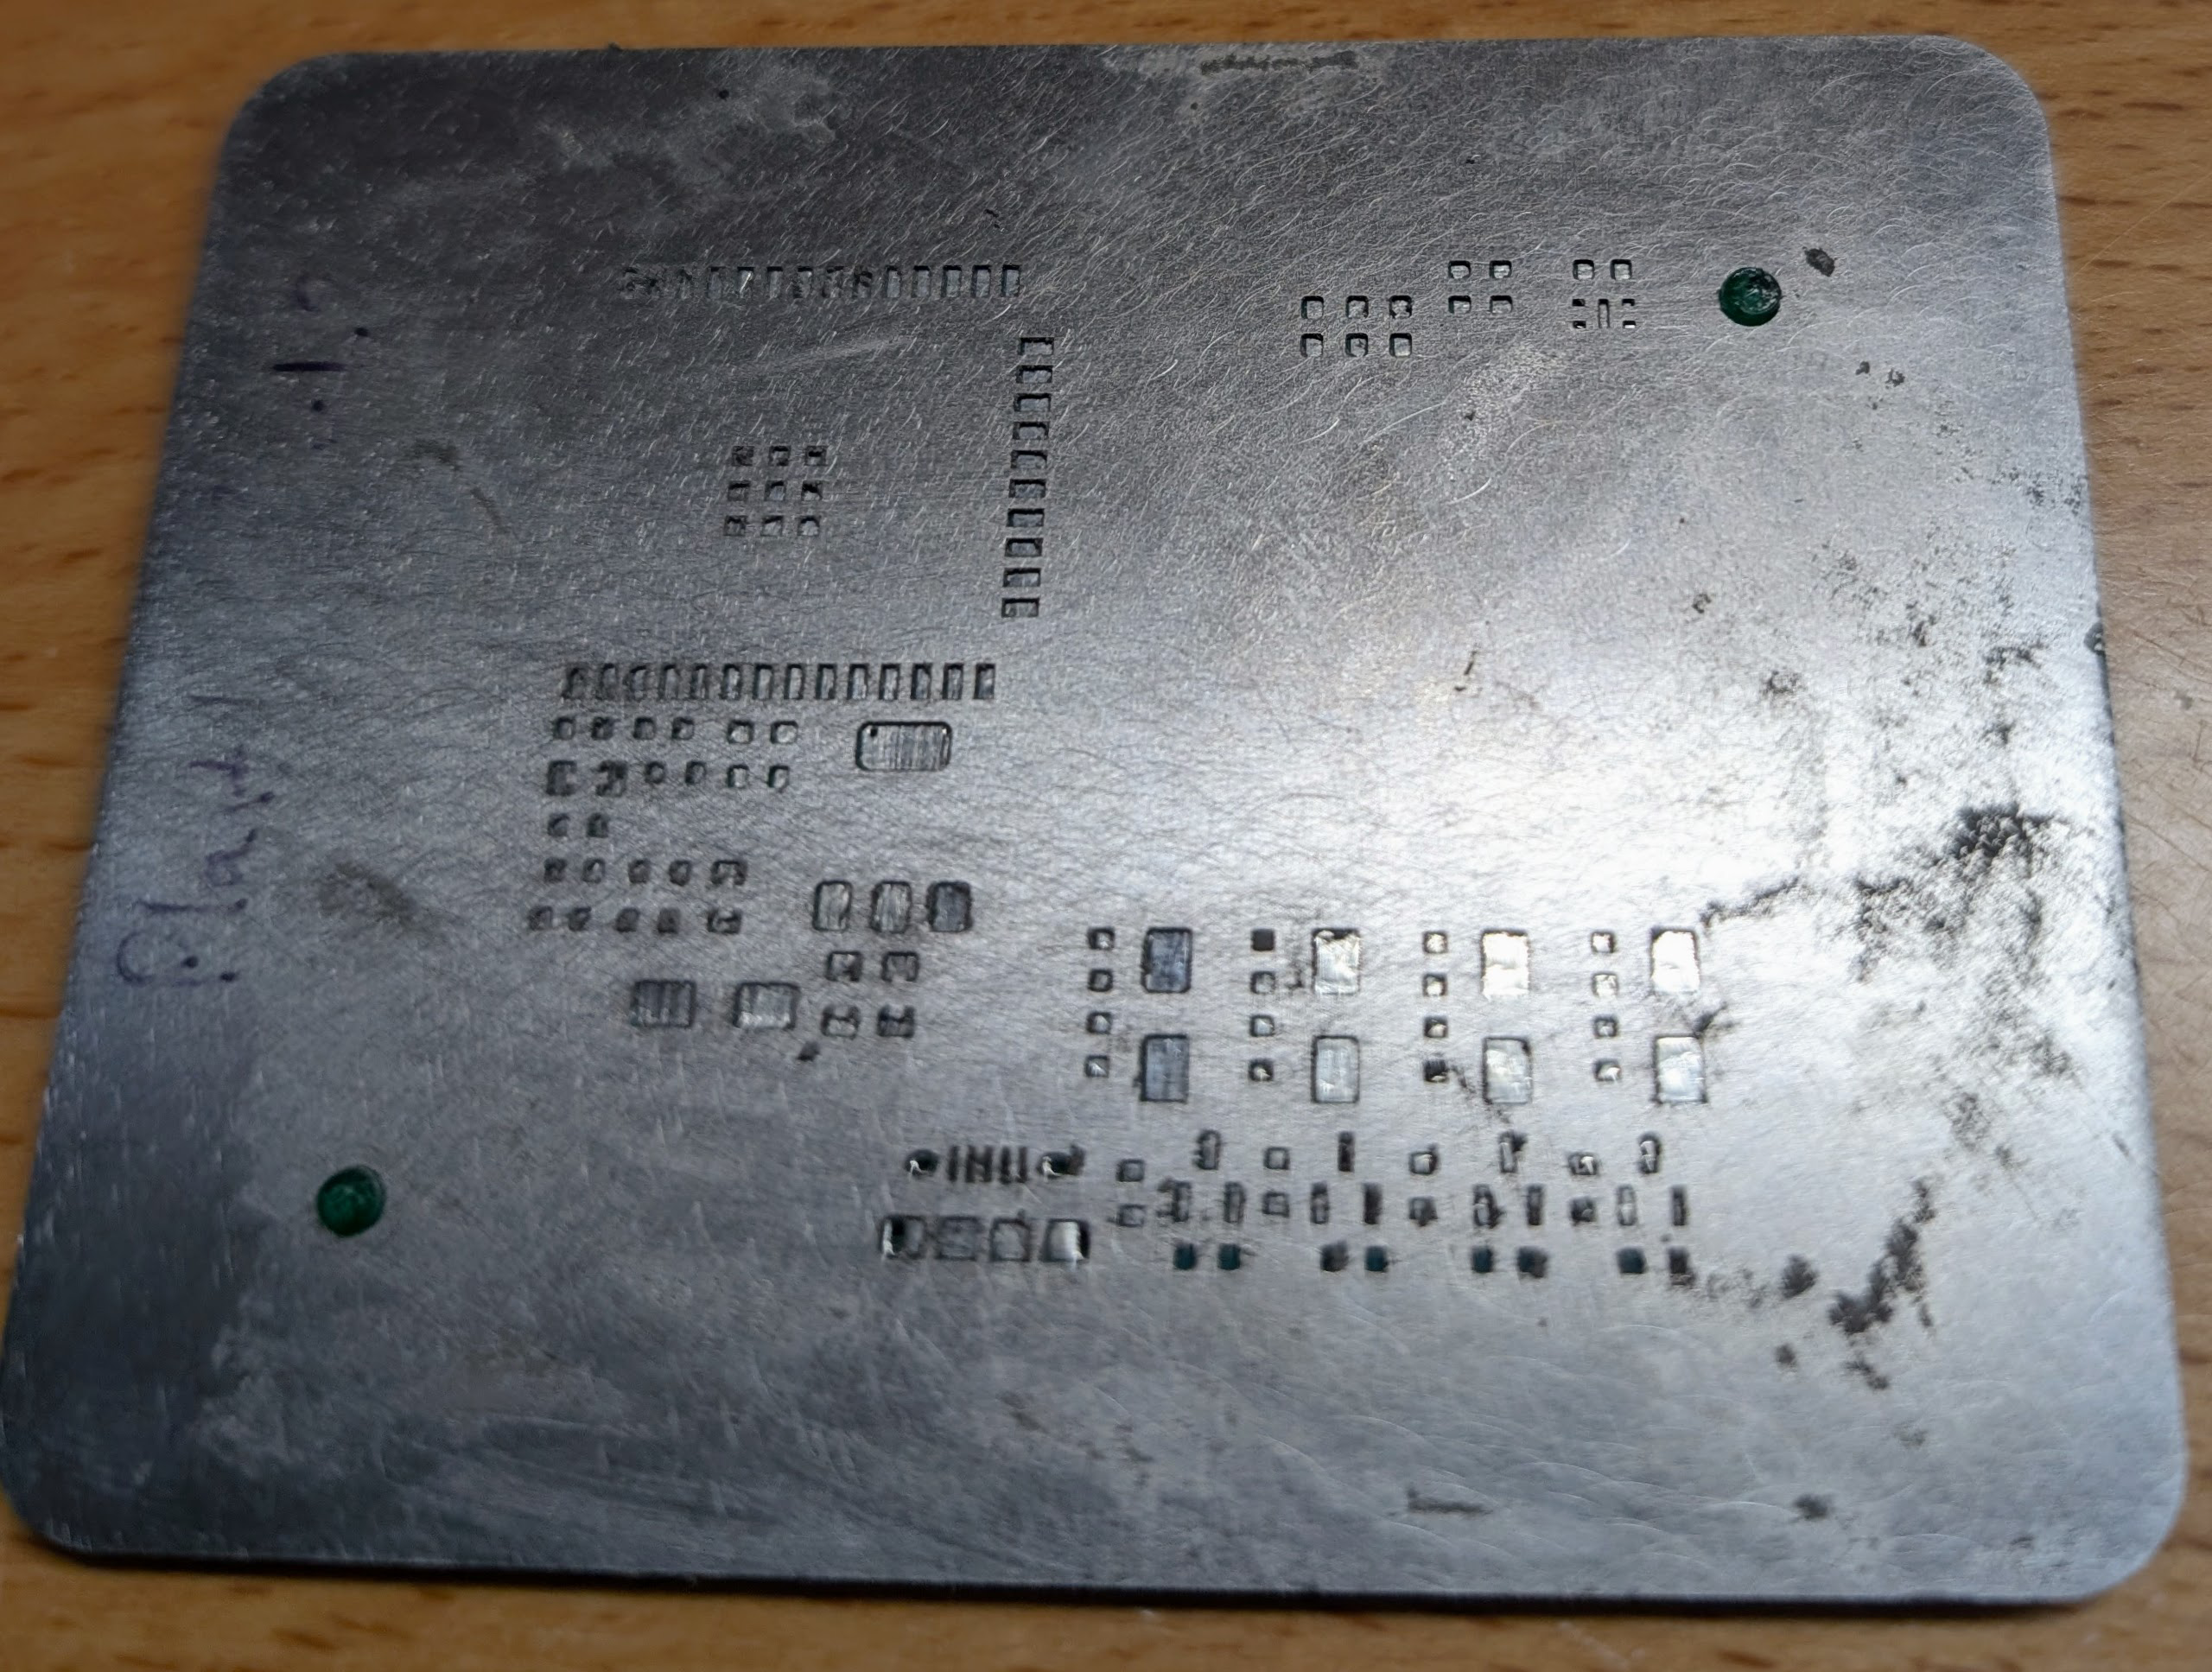
One of the tricky steps in hand-assembly of printed circuit boards (PCBs) with SMD components is the deposition of solder paste on the PCB. Ordering a stencil with the PCB is one way to make this easier. When I order a PCB from this blog’s sponsor PCBWay, I order the smallest size stencil that can work for the PCB. In my PCB design, I add screw holes at two or more corners to hold the board in place in its project box. As mentioned in DIY SMD PCB Assembly and Dough133 Assembly, it is a good idea also to add holes in the stencil for the screw holes. Do this by adding them to the front solder paste layer of the screw hole footprint. This allows the stencil to be held in place with perfect alignment on the PCB when applying the solder paste.
The Challenge of Manual Stencil Alignment
I used to do this by simply attaching the stencil onto the PCB by inserting screws through the screw-hole in the the stencil and then the PCB, and tightening the screw into a nut to hold everything in place.
Although this keeps the stencil perfectly in place, it is also awkward in a few ways;
- Screwing the bolts through the board and stencil requires two hands: one to keep the nut from turning, and one to turn the screw. The process thus takes a little time.
- When applying the solder paste, the board is supported by the nuts at the back rather than lying flat on the work surface.
- Removing the stencil must be done carefully to avoid smearing the solder paste. I often ended-up with some smearing as I remove the screws and then the stencil.
I realized that my 3D printer could make this process much easier.
A Better Way: The 3D Printed Alignment Fixture
Instead of using a screw and nut to hold the stencil in place, I now print a simple fixture
with my 3D-printer.
The fixture has a frame for holding the PCB and round pegs to go through the screw holes
of the PCB and then the stencil.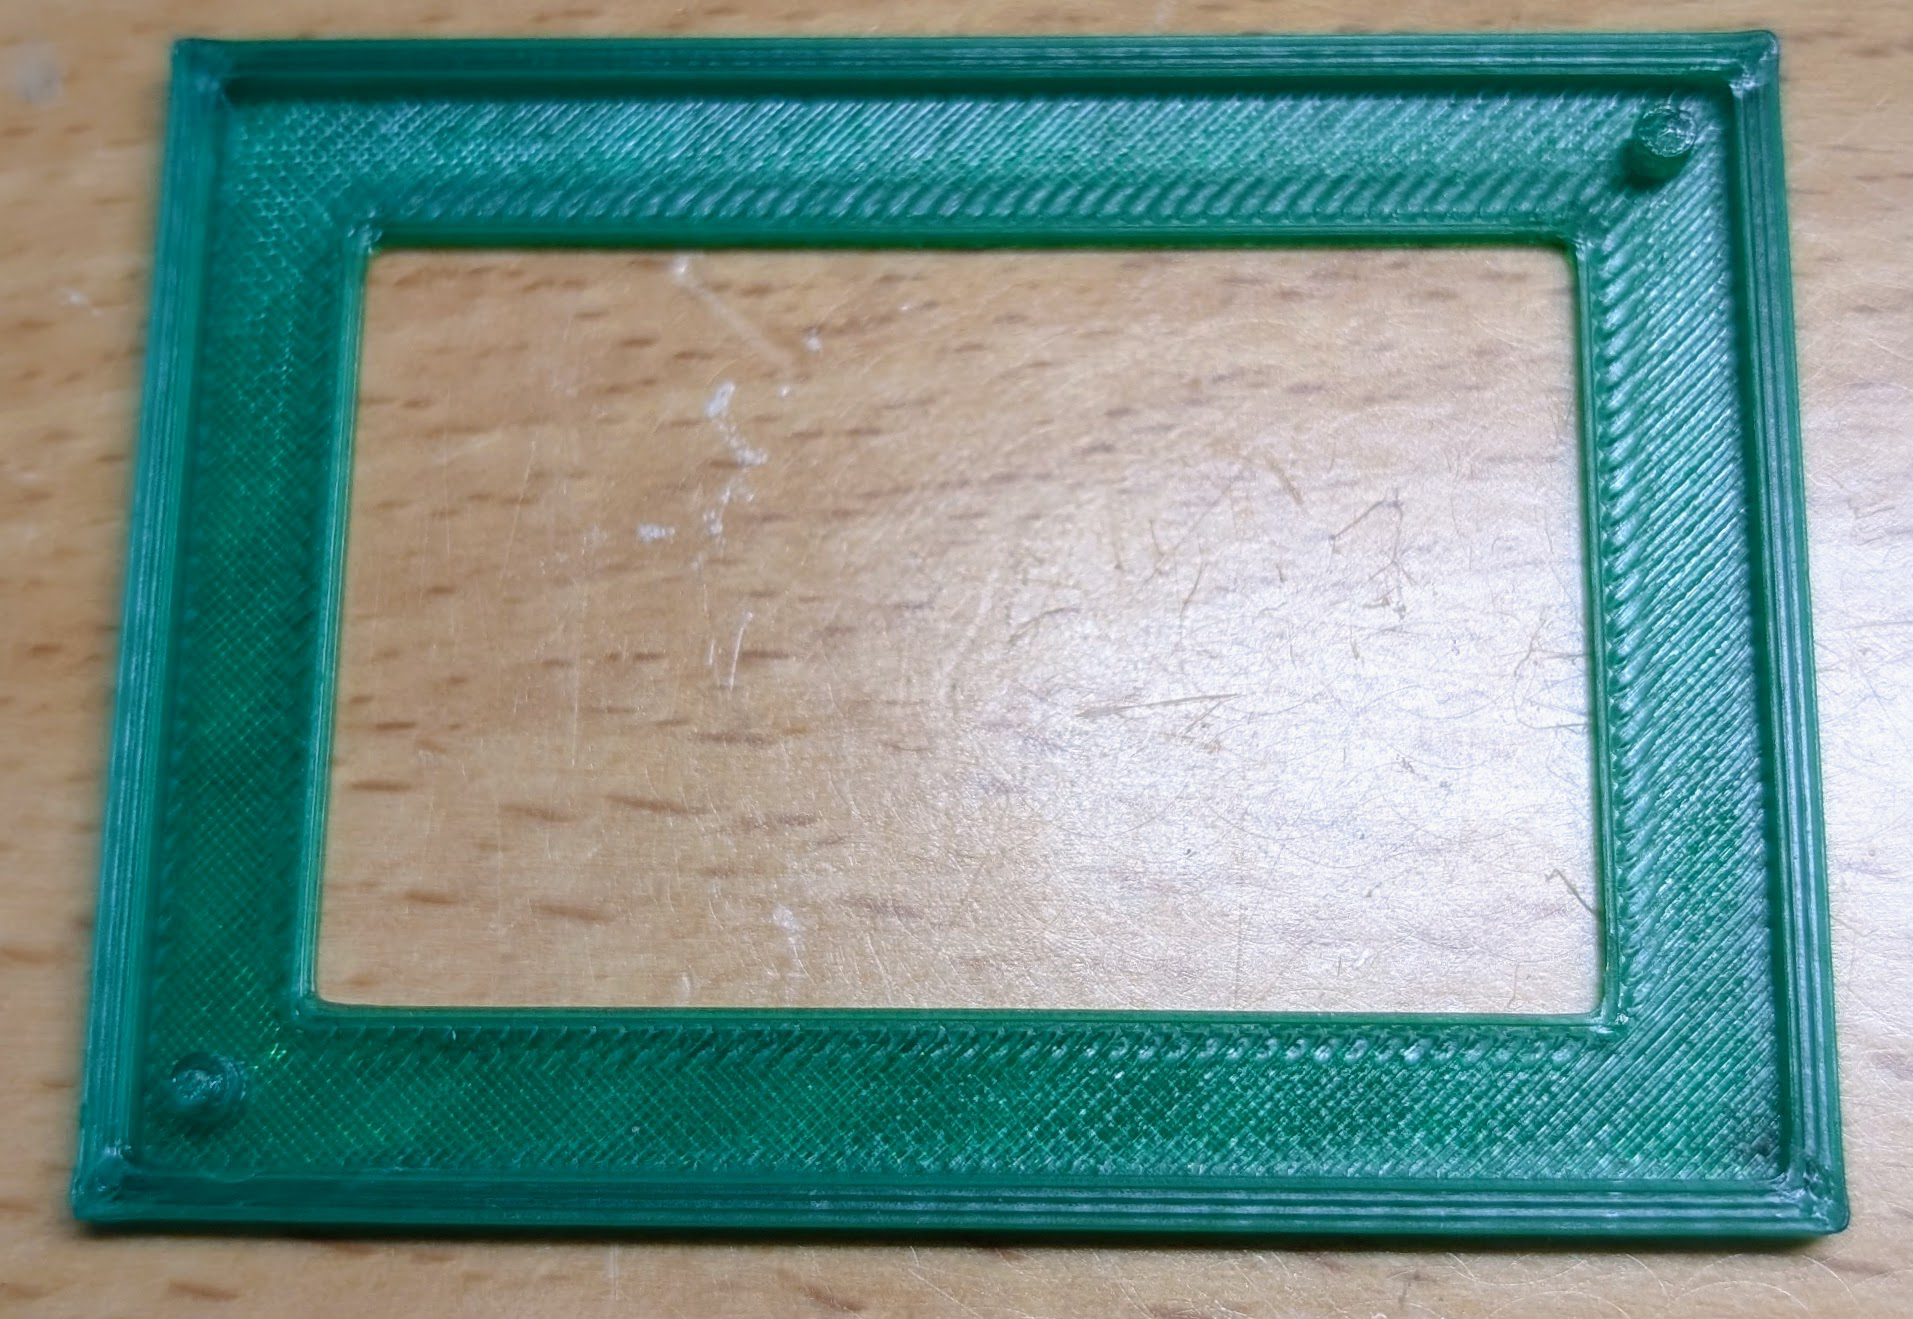
Simply place the PCB in the fixture,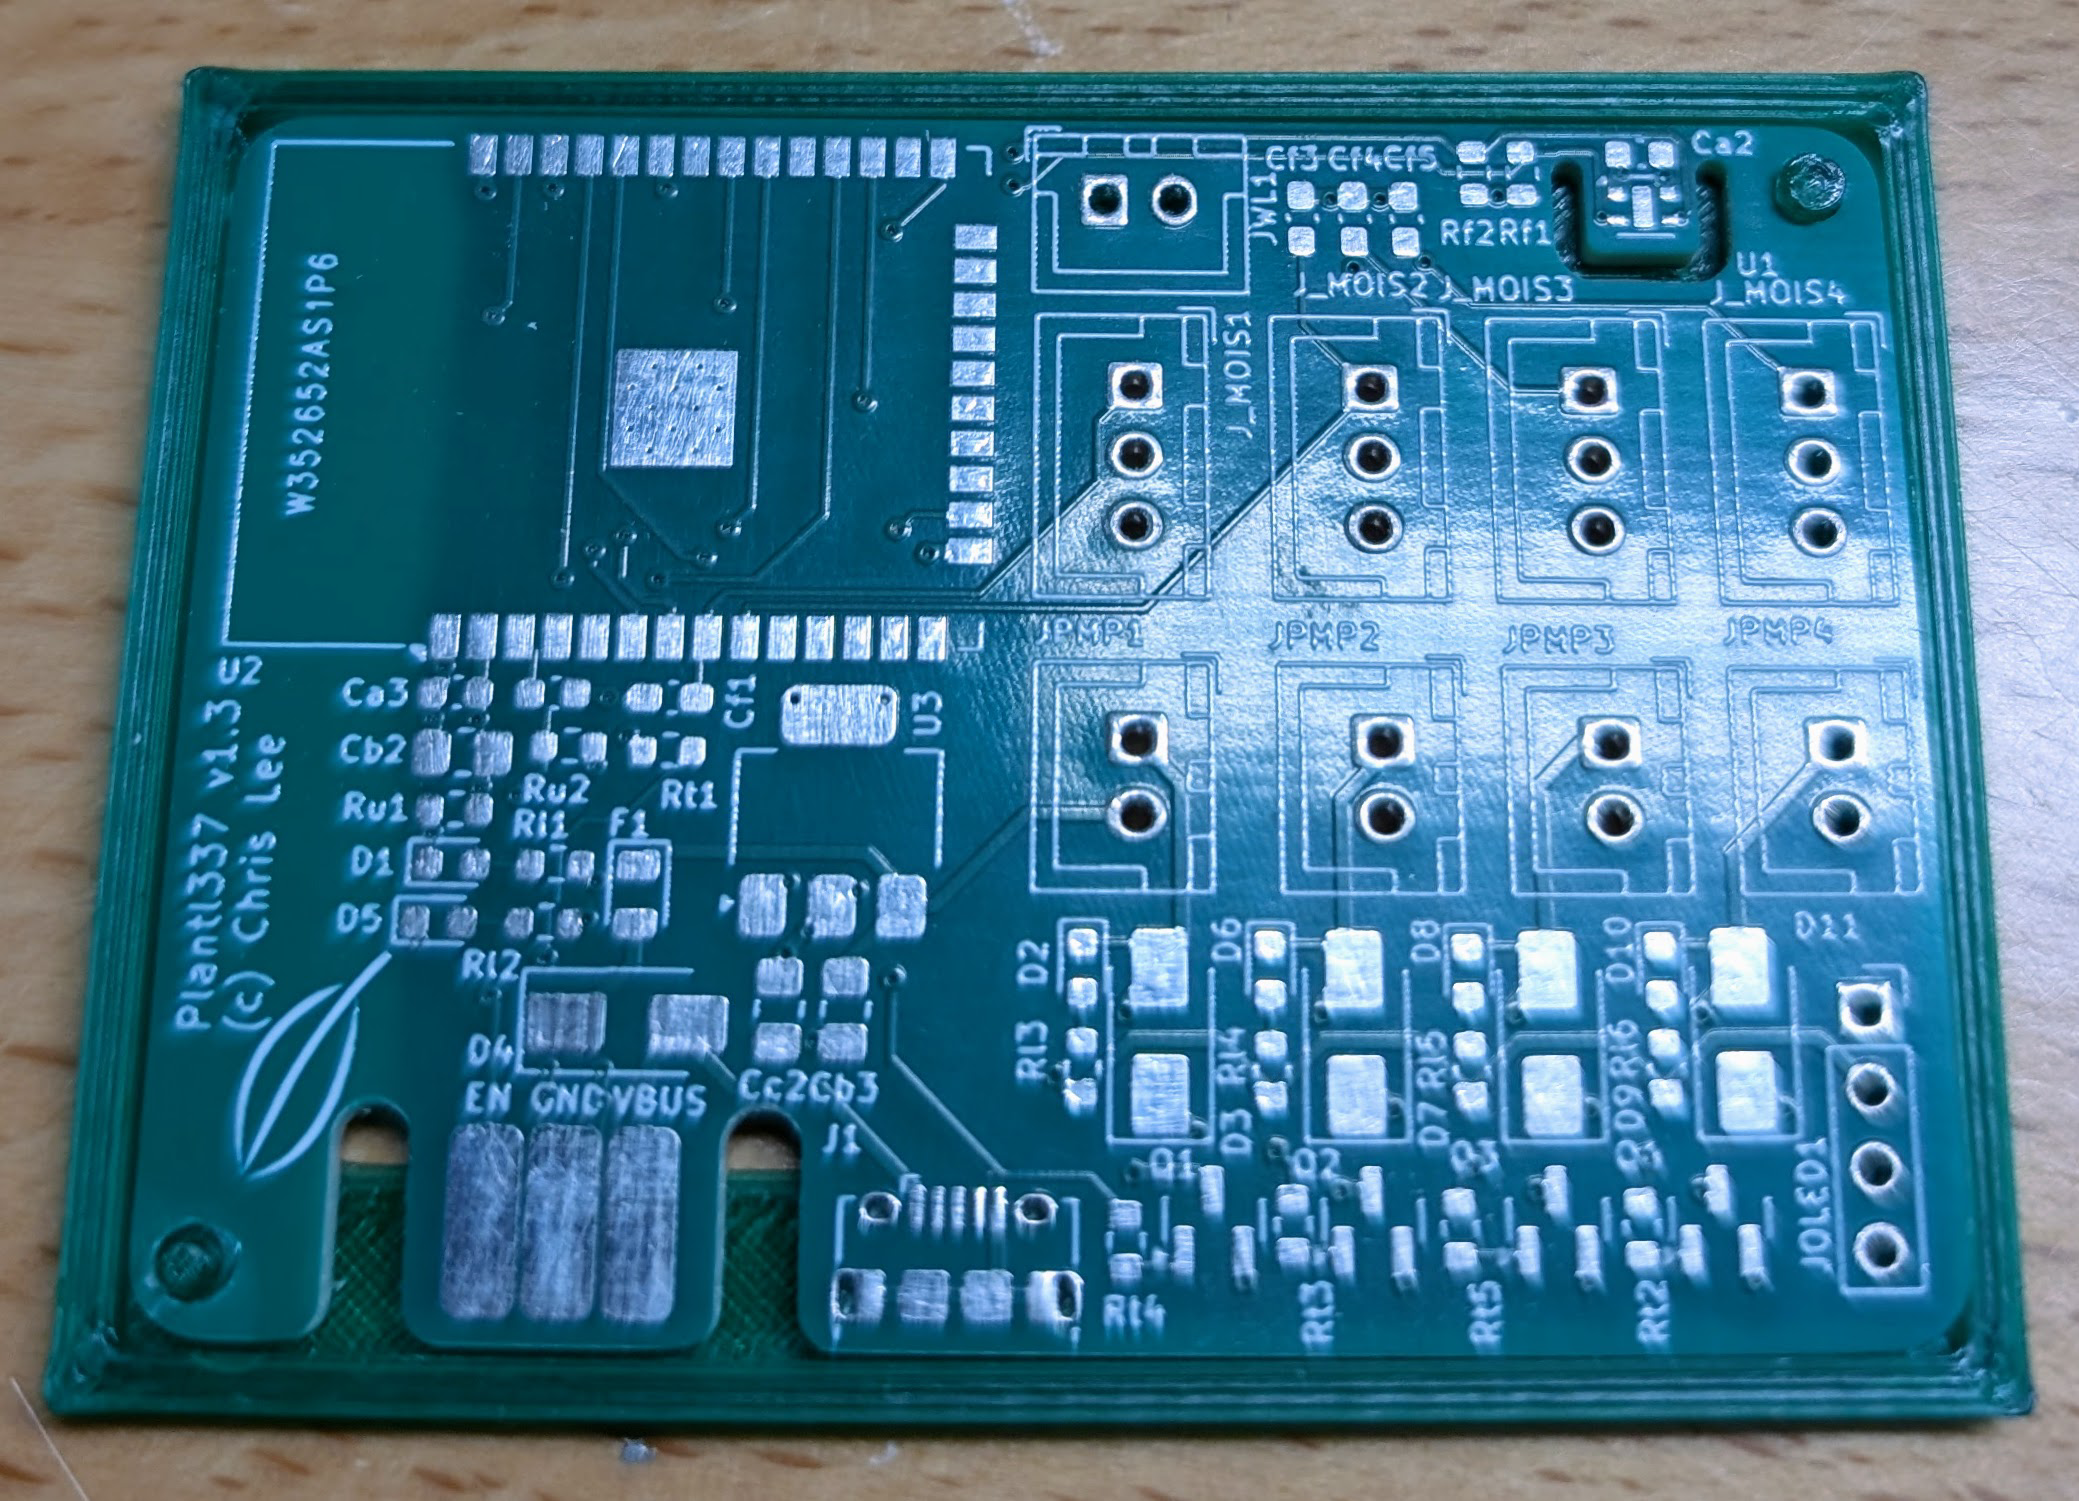
The edge of the frame should be flush with the top surface of the PCB when the board is placed in the holder. The pegs must be long enough to go through both the board and the stencil, but not longer. If the pegs are too long, it will be difficult to remove the stencil without smearing the solder paste.
Use the Fixture for Precise Solder Paste Application
Then apply solder paste around the holes in the stencil, and use a putty knife to push the
paste into the holes so they are filled evenly.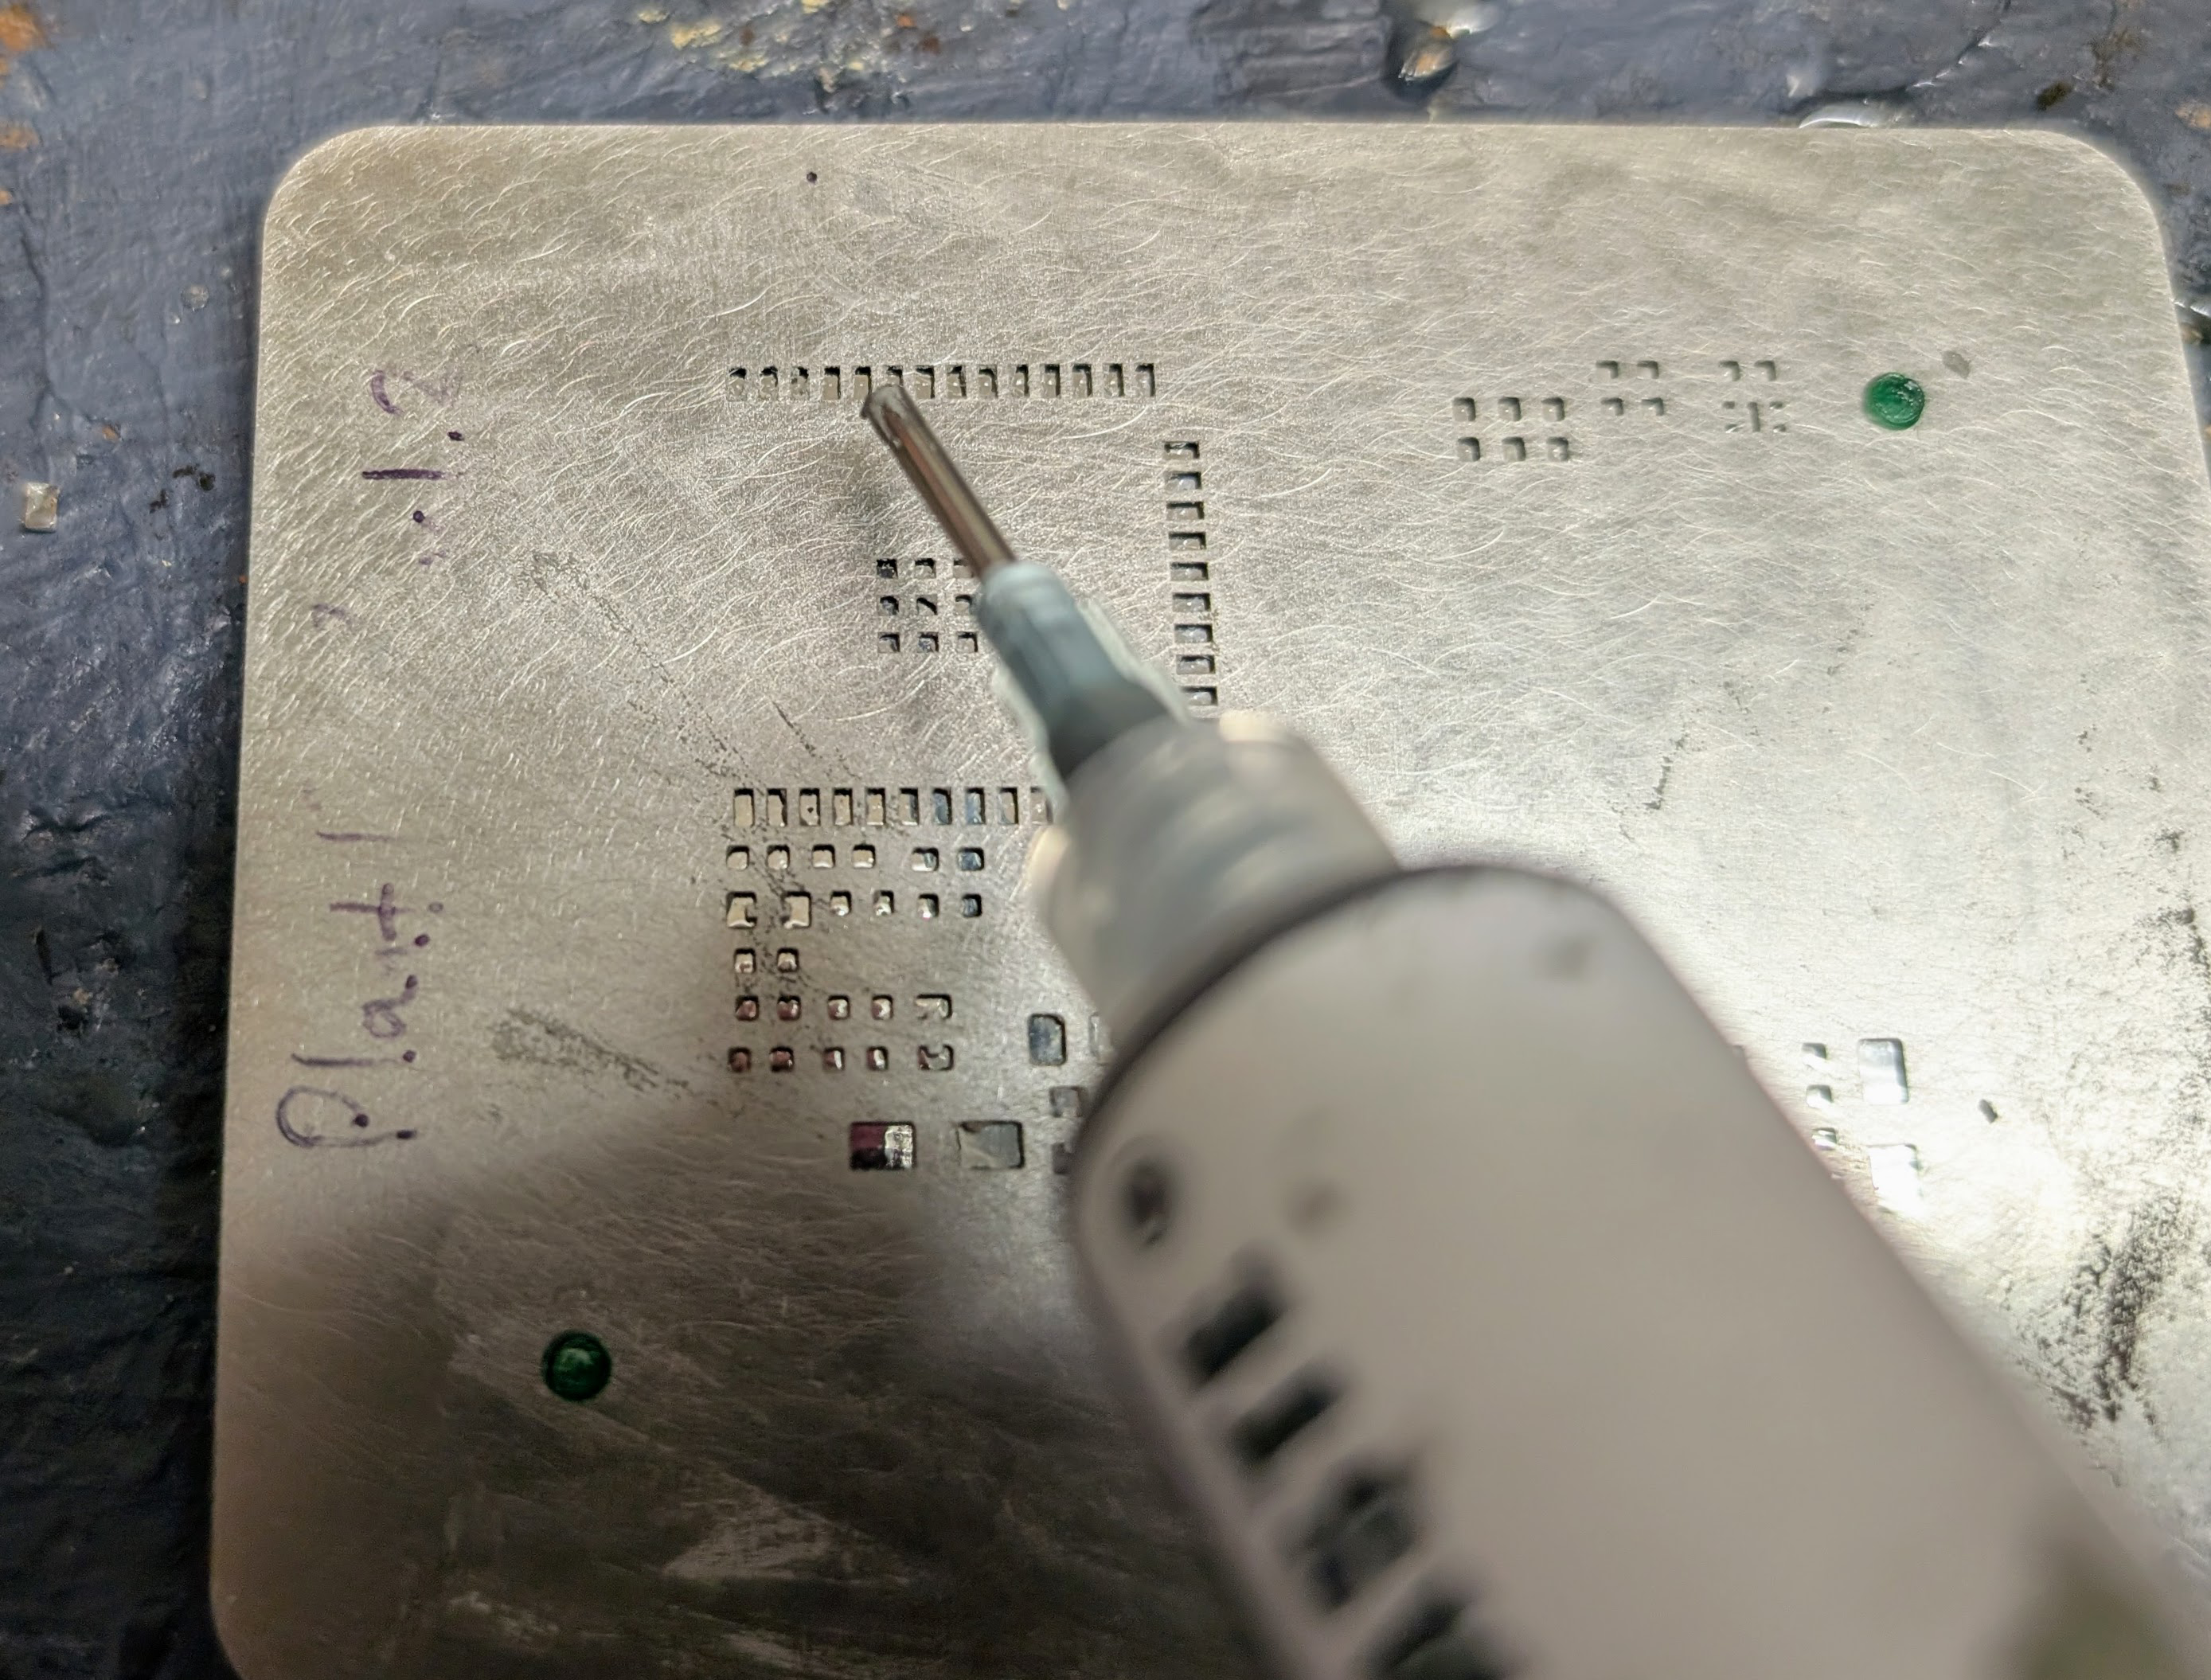
The fixture sits flat on the work surface while the solder paste is applied, and it is much easier to remove the stencil at the end. The relative ease of removing the stencil makes it less likely that the solder paste will be smeared on the surface of the PCB as the stencil is removed. The empty space at the back of the frame makes it easy to pop the PCB out of the frame, when finished, so the next board can quickly be set in place.
The process is much easier, and saves significant time when preparing multiple boards for assembly.